Bookmark and Share
Showing posts with label Fabric paint. Show all posts

Thursday, June 14, 2012

Bicycle Dress from T-Shirt

 This size 3-4 girls dress was made using a free pattern and instructions by Dana from "Made" using a large t-shirt.  The only variations that I made is instead of freezer paper stenciling a banana for the "Warhol" dress, I used free clip art from The Graphics Fairy of a Vintage Bicycle and added a ruffle at the bottom using a decorative stitch.

Items used:
  • Free pattern and instructions from Dana from "Made"
  • The Graphics Fairy of a Vintage Bicycle
  • T-Shirt (I used a women's large)
  • 2 pieces of fabric 2 1/2 inches by 26 inch fabric for bow
  • 1 piece of fabric 2 inches by 36 inches for ruffle
  • Printer and paper
  • Black fabric paint
  • Scissors
  • Iron
  • Sewing machine and matching thread 
  • Straight pins 

I followed the instructions up to cutting out and stitching armholes and gather stitching, but before stitching together I printed off a half-page image of the bike then played around with where I wanted to position it on the dress.


 Using the black fabric paint I went over all of the black lines with black paint the positioned it on the t-shirt with the paint side down and lightly patted it down to transfer the image (Note:  it will be a mirror image to whatever image you are transferring, so it won't work with lettering).


For the remainder of the dress, I followed the instructions.

I also added a two inch ruffle (approximately 1 yd wide) at the bottom, using an iron to press up a 1/2 inch hem then stitching down and using a gather stitch at the top.  I then sewed the ends together, pinned underneath the shirt at the hem then applied the decorative stitch to finish.

Linking up to:

Saturday, June 25, 2011

2 GNOME ME IS TO LOVE ME

 This is for day Day 24 of 30 Days of Creativity for the theme "Gnomes".

I have a hatred of lawn gnomes so no way was I going to go that route, so instead I decided to use my "Let's Make T-Shirts" program and a free clip art from http://www.gnurf.net/v3/clip-art/free-clip-art-010.html 
for the Gnome to design a punny play on words "To (Gnome a/k/a know me) is to heart (love) me to printout and iron on night shirt. 

After ironing on, I embellished it with red fabric paint.  At some point I will post at Cut Out + Keep along with a free download of the design both regular and for t-shirts (which is a mirror backwards image so the lettering comes out right when ironed on).

Saturday, June 4, 2011

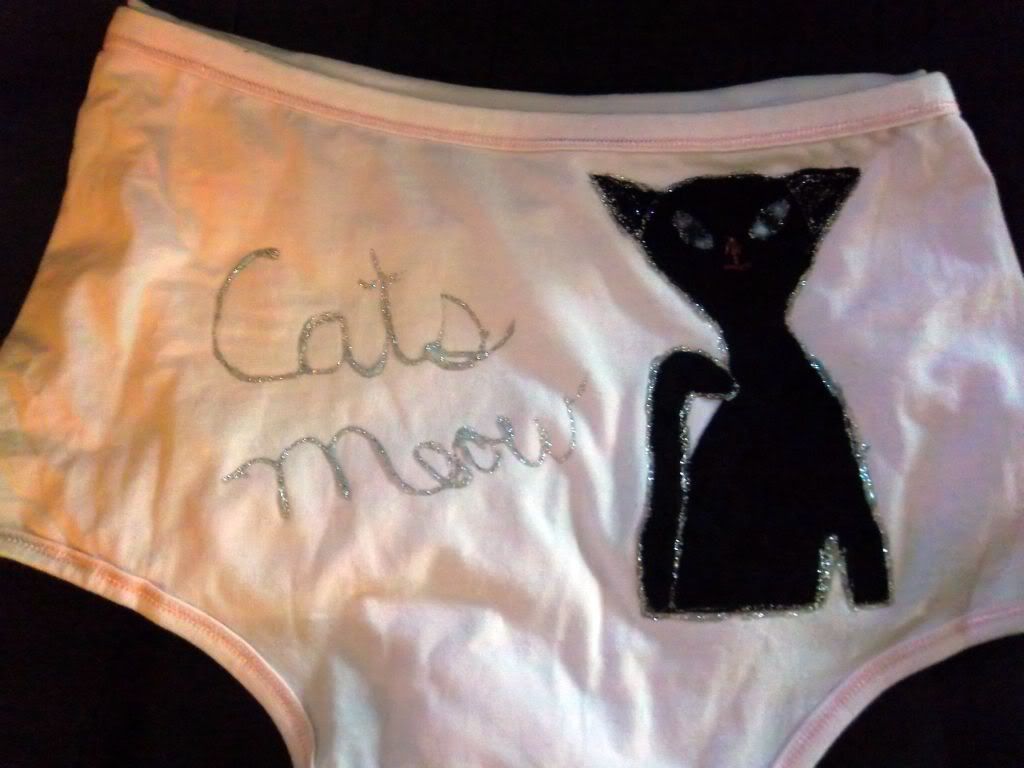
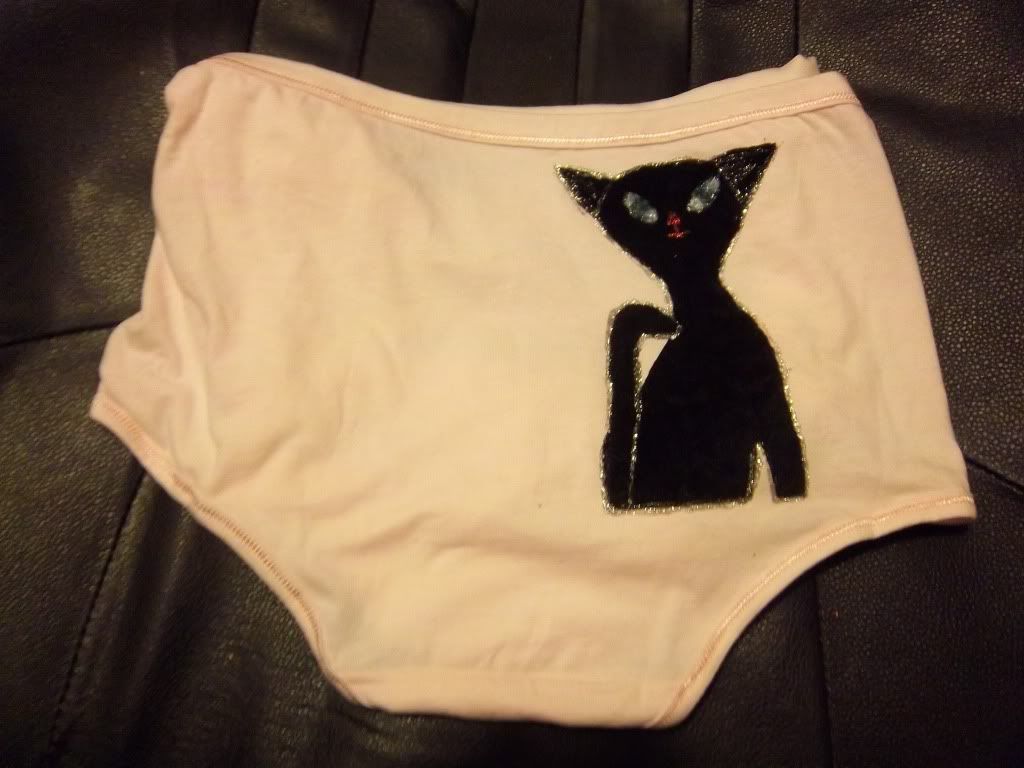
Vintage 50's Cat Inspired Panties

Photobucket
I am participating in 30 Days of Creativity and  just learned of it today and had to go with what I have on hand.  Today's theme is "Cat Meme", so I had a "make it work" moment and I decided for my inspiration to use a 50's cat decoration that my Mom used to have as an inspiration to decorate a pair of panties that I have (originally was going to do a notebook but could not find any scrapbook paper on hand that would work.)

Items used:
  • Full Panty (a/k/a "Granny Panties")
  • Scissors
  • Paper
  • Marker
  • Scrap of black fabric
  • Heat 'N Bond
  • Iron
  • Scissors
  • Fabric paints

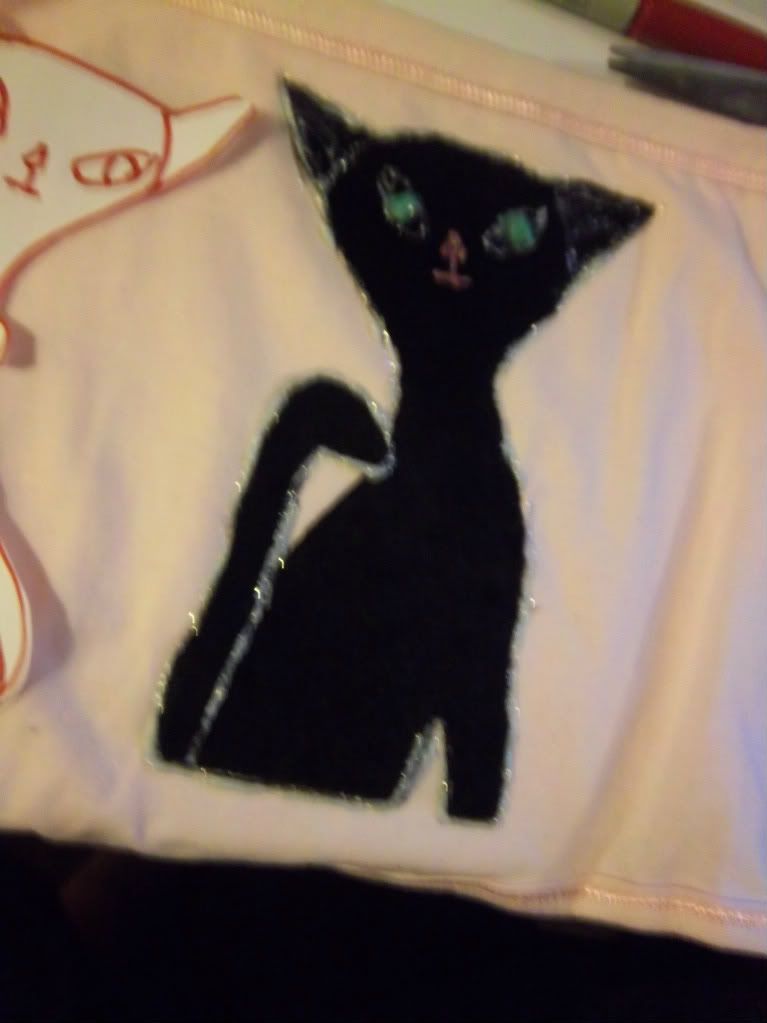
I drew the cat - it is about 6 1/4 inches tall and about 4 inches wide at the ears.

Iron a piece of Heat 'N Bond to a piece of 7x5 inch piece of black fabric on the wrong side of the fabric, then use the picture to make template and draw in marker on the Heat 'N Bond.  You end up with a negative of the picture.

Photobucket
Iron image on to object (in this case, panties).
Photobucket

Then use fabric paints to finish off the outside edges and draw eyes and ears (I used silver) and then fill the pupils (I used metallic green), the nose and mouth (I used metallic red) and then let dry then fill in whites of the eyes (I used a few layers of metallic "Glittering Crystal").  It seemed a little plain so I wrote "Cat's Meow" in silver.
Photobucket

Monday, September 20, 2010

Leaves Headband


See Leaves Headband and 1000's of others - or share your own on Cut Out + Keep

Direct link to project  Leave Headband

I made this to be a fun fall themed headband, but it could be used as part of "Mother Nature" or "Fall Fairy" costume.

I made this using a pack of silk "leaves" from the Dollar Store and a fabric headband that was approximately 1 1/2 inches wide at its widest point, but it would be easy to make your own leaves out of scraps of fabric on hand and have included a pattern and instructions for that also.

See the "How-To" at Cut + Keep

Friday, September 4, 2009

Fairy House - Funky and with Flowers

Here is another fairy house for the garden under my eaves and for this one, I decided to make it funkier and with flowers. The link to the original project and link to the original inspiration at Filth Wizardry is here: http://craftsandcreationswithkathy.blogspot.com/2009/07/fairy-house.html For this project I used markers and green fabric paint to decorate, along with gluing on silk flowers and leaves to the cap, then sprayed everything with clear acrylic glue.

Thursday, September 3, 2009

ANOTHER FAIRY HOUSE

This is another fairy house for my garden under my eaves. Here is the link to the original, along with a link to the original inspiration that was on Filth Wizardry http://craftsandcreationswithkathy.blogspot.com/2009/07/fairy-house.html For this project, instead of using Sharpie markers to decorate, I used fabric paint on the outside and used a black Sharpie marker to outline the windows, then sprayed the project with clear acrylic paint. In the center I used "Fiona" from Shrek that had been a Happy Meal toy my son got several years ago.

Monday, June 8, 2009

SEA MONSTER GLOVE PUPPET

This craft was created for Sherry at About.com Family Crafts challenge on what to make with a lonely glove that had lost its mate and I am proud that it has been featured on her site: http://familycrafts.about.com/od/glovecrafts/a/seaglovepuppet.htm

When my son was little he had a whole collection of "glove puppets" that he enjoyed playing with (although is favorite was mosquito that he nicknamed "Nipper"). I was pressed for time, so I made this simple project to demonstrate what you can make with a lonely glove.

Items used:

  • 1 glove
  • Scraps of fabric or felt
  • Scissors
  • Needle and thread
  • Sewing machine (optional)
  • Fiberfill (optional, can use scraps of fabric)
  • Piece of scrap cardboard
  • Fabric paints
  • Lid off a margarine tub

To make the head, I used the lid of a small tub or margarine to cut out a circle.

I then ran a basting stitch all the way around the edge, then gathered it up slightly and stuffed it with fabric scraps and finished gathering it up until there was only about 1/2 inch gap. (I did mine on the sewing machine, but you could hand baste instead). To prep the glove prior to hand-stictching the head on, a piece of cardboard was inserted so as not to stitch through to the bottom layer by accident. Position the head just above where the fingers meet the body of the glove on the top and hand-stitch the head down.

He was then painted with lavender fabric paint dots (one side at a time then allowed to dry) and then the circles were outlined with blue glitter fabric paint, then a face was drawn on with black, white and red fabric paint (but you could use any colors you wanted).

Monday, June 1, 2009

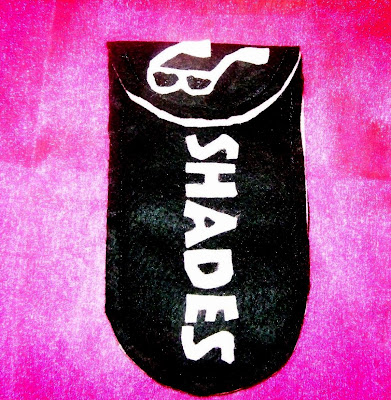
"Shades" Sunglasses Case

This is a pattern that I created for Jenny Garland's pattern design craft challenge. I wanted to come up with something that would be easy for someone to re-create, low cost, and could be adapted for either females or males and even kids to make and use (We will probably use brown and tan to make to a case for my son's Dad for Father's Day). It holds a pair of sunglasses and has another compartment hidey hole to put anything else you would like in it (tissues, gum, a comb, a few dollars, etc.) but not scratch the sunglasses.
This is the first time I have ever designed a pattern for someone else to make and if you have any questions or if I need to clear any thing up, please let me know.
Items used for this project:
  • 1 piece of black felt for the outside (you could choose any color you like).
  • 1 piece of light pink felt for the inside and trim (you could choose any color you like)
  • Scissors
  • Tissue paper to draw the pattern on to (I used yellow - optional if you printed off the pieces off a printer - you could just use the printer paper)
  • Straight pins to pin the pattern to the felt
  • Sewing machine (if you don't have one you could use a hot glue gun to put together)
  • Hot glue gun and glue sticks (if you don't have one of these but have a sewing machine, you could sew the entire thing)
  • Hand stitch needle and thimble (you could hand stitch the entire thing if you don't have sewing machine or glue gun - this would be a better option for grade school kids to try to made on their own).
  • Black thread (to match the outside color - you could use contrasting thread or if you just glue the the entire thing, thread would be optional).
  • Clear tape to tape over the "Shades" lettering and the sunglasses to stablize for cutting
  • Black fabric paint (to color in the lens on the shades instead of cutting them out)
  • 1 set velcro closure (I used the self-stick, but still used a glue gun to attach them - you can get several sets from the Dollar Store or craft stores).

Here is the pattern. As don't have a scanner to make it to scale, I have posted the piece individually and you could get them to scale using a the Paint program that is on most computers under Accessories, or copy and pasting into a Word program.

This piece is the main pattern piece - cut two of the main color and 1 of the contrast color and one of the main color (disregard the instructions on the pattern below -I cut 2 black and 1 pink and ended up with an extra black piece). Made small cut on the contrast (pink) piece on each corner where the dotted line).
The pieces are 10 inches wide and 4 1/4 inches tall.
This is the front of the case. You are only going to need to cut 1 of these in the main fabric color. (I cut 1 black). It is 8 inches wide and 4 1/4 inches tall.
This is for the "Shades" lettering - it is 5 inches wide and 1 1/4 inches tall in contrast color (I used pink).
The lettering for "SHADES" is font CENTURTY GOTHIC and the size is 86 (as there is no drop down for this - you type in 86 in the font box) you could just type this in a notepad or word program and print it off instead of trying to copy this from the picture below.
Here is the pattern for the sunglasses. It is 3 inches wide and 1 1/2 inches tall and cut out in the contrast color (I used pink).
Instead of cutting out the center for lens of the glasses, you could use fabric paint to color it in. I originally tried putting a sequin in the middle, but would not recommend doing that as it made it look like a burlesque bra (although I do suppose you could adapt the case for pasties holder if you are a burlesque dancer or have a person on your Christmas last that is).
This is what the pieces looked like cut out.
On the Shades lettering and the sunglasses, I stablized the paper with clear tape to make it easier to cut out so it wouldn't rip or tear. I used craft scissors on these pieces instead of my fabric scissors and I didn't want to dull the fabric scissors, but that is a personal choice.
Cutting out the "Shades" lettering can be tricky -grade school children would need assistance with this and may need to use smaller scissors if you have them. To cut out the center of the A and the D I folded the felt slightly then made a small cut in the center, then put the tip of the scissors through the hold and carefully snipped around the edges. This is what it looked like when I was done.
Unpin the felt from the tissue the put the main full felt piece (black) on the bottom, put the contrast piece (pink) on top of it, then cut the contrast piece where you have made the snips on each side and put it slightly over the edge of the black fabric, then put the shorter body top piece (black) on top of the pink, then pin the edges and sew the bottom edge edges all the way around, then the top edge all the way around (if you are going to use hot glue, you would want to glue each layer separately).
In this photo the top of the case is to the left and the bottom on the right.
For the "SHADES" lettering and the velcro closure, I used hot glue. Before gluing, lay out the letters and the closure to see where you want to position them, then attach glue to the back and glue each piece down one by one.
For the sunglasses, position this on the top where you want to then apply hot glue to the back of the glasses then glue it down and use the black fabric paint to color in the lens of the shades.
If you like what you see, please take a minute to vote for this project at Jenny Garland http://www.typepad.com/services/trackback/6a010535924717970b01156fbeff7b970c
If anyone does make this, I would love to see your creation/interpretation!
Happy crafting!

Wednesday, May 27, 2009

MS. PAC MAN PANTIES

I have seen panties in the store similar to this start at about $12, these cost under $2 to make. The inspiration for these panties is from the picture at Wikipedia. http://en.wikipedia.org/wiki/File:Mspacman.png I did it freehand by looking at the picture and didn't have several of the colors so it is an "artist's interpretation" of the game. It was a fun project because since it is just underwear, I didn't have the pressure of it being perfect and just improvised as I went along. At some point I want to do a t-shirt, but think I will try to make a stencil. On the back of the undies it has "Ms. Pac Man" in Violet glitter fabric paint, a game board in the middle with Ms. Pack Man on the left and a red ghost, both which were touched up with acrylic paint because it looked too blotchy, and on the right and 'walka..walka..walka" below. On the front of the panties I wrote "Game Over " in glow-in-the dark paint. Items used:
  • 1 pair of black panties
  • Fabric paints
  • Yellow and red acrylic paint
  • Paintbrush

Wednesday, May 20, 2009

Broken Keyboard Desk Tray to Garden Sign

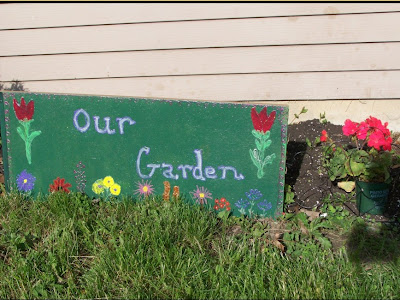
The keyboard tray broke off of our computer desk about 2 years ago and like with most things, I held on to it until I came up with a craft application for it and when we decided have a mini flower and herb garden outside our door I decided turn the tray into "Our Garden" sign which functions as a decoration until the plants start growing and a barrier so the fella that mows our lawn doesn't mow over the budding plants (like he did last year).
Here is they keyboard tray before, but any old piece of wood could be used.
Items used:
  • Piece of wood
  • Colored spray paint (we used green)
  • Clear gloss spray paint
  • Acrylic paints
  • Fabric paints
  • Paintbrush
  • Wire lawn edging (from the Dollar store)
  • Newspapers or trash bags (to put down when spray painting)
First, my son put down trash bags outside then layed the board flat and spray painted the front with of the board (it started raining before it dried and had to set it upright under the awning is the reason it is photographed upright).
After it was dry, I used acrylic and fabric paints to paint the flowers on the board and wrote "Our Garden" freehand on the front.
My son then took the decorated board outside and used the clear spray paint sealant on both sides and the edges, allowed that coat to dry then put another coat on and allowed it to dry.
After the clear coat was dry and I put in the plants, I put the sign out in front of our mini garden, firmly placing the edge that had attached to the desk in the ground and secured the other side by putting in the dollar store decorative wire eding about 3 inches behind the sign.
The total cost out of pocket was under $4 as I had everything on hand except the wire edging from the dollar store ($1) and the clear gloss spray paint ($2.77 from Walmart for 1 can and it is still almost full and can use for other projects).

Saturday, May 2, 2009

VHS PRINT SHIRT

My inspiration for this shirt was from the following by user pOre where she used a cassette tape to make a stamp on fabric. I am a VHS tape junkie, I used a VHS tape for mine instead. http://www.cutoutandkeep.net/projects/cool_cassette_t_shirt Items used
  • T-shirt fabric shirt (I used a long sleeve mock turtleneck)
  • Acrylic paints
  • Fabric Paint
  • Paintbrush
  • Large plastic envelope mailer (to put between the front and back layer of the shirt to prevent bleed through of the paint.

Slather the paint directly on the back of the video tape.

Note: For this project, I have found that acrylic paint worked better than fabric paint as it was easier to smooth on the cassette.

Also, the colors you use will turn out different on the completed project than on the bottle depending on the color of shirt you use.

The colors that I used were white for top (it looks like light blue), gold for the center.

The third imprint ended up being a combination of khaki green and metallic silver acrylic paint and violet glitter fabric paint. I used a shade of khaki green for the bottom, but it was too faint on the dark fabric. I then tried violet glitter fabric paint and it was globby in some places and non-existant in others. I then put a layer of metallic silver over the top. It turned out funkier than I had planned, but this is my first attempt at such a project.

Immediately press the cassette where you would like on the shirt paint side down, then press and lift up and repeat until you have the number of imprints that you want. For my shirt I made the top and the bottom prints horizontal and the center one vertical.

Friday, April 24, 2009

Jellyfish Panties

I decided to decorate a pair of my pink panties with Jellyfish and used the following as inspiration
As it was too delicate to try to stencil, it was done freehand but was pretty easy due to the drawings; you basically draw a half circle that is a little rounded on the bottom then add squiggly lines making them thicker in the center.
  • Panties
  • Scribbles Violet Glitter Fabric Paint
  • Jellyfish picture

Cost: $1

Panties $1

Paint On hand (but to buy new it runs around $1 at craft stores)

Jellyfish pic - free by looking up on the internet

Time to draw: About 5 mins each side

Drying time: About 20 mins each side

Friday, April 17, 2009

Christmas ornament to ornamental pin

This is a just a Christmas ornament in the shape of a musical note that I found for fifty cents at a thrift store that I made into an ornamental pin to wear. Gather the items you are going to use for your project. I used:
  • Christmas ornament
  • Strip of sequins by the yard from my stash
  • Split jump ring
  • Pin Back
  • Scissors
  • 9001 Clear Glue
  • Fabric paint (optional - I used two dabs of glow in the dark paint on two of the stones for added interest)

Attach the split ring to the top of the ornament, then to the center of the pin. Put the glue on top of the pin the put a strip of sequins on the top and press down firmly, then let dry.