 Here is another fairy house for the garden under my eaves and for this one, I decided to make it funkier and with flowers.
The link to the original project and link to the original inspiration at Filth Wizardry is here:
http://craftsandcreationswithkathy.blogspot.com/2009/07/fairy-house.html
For this project I used markers and green fabric paint to decorate, along with gluing on silk flowers and leaves to the cap, then sprayed everything with clear acrylic glue.
Crafts, creations, recipes, reviews and anything else that strikes my fancy.
Friday, September 4, 2009
Fairy House - Funky and with Flowers
 Here is another fairy house for the garden under my eaves and for this one, I decided to make it funkier and with flowers.
The link to the original project and link to the original inspiration at Filth Wizardry is here:
http://craftsandcreationswithkathy.blogspot.com/2009/07/fairy-house.html
For this project I used markers and green fabric paint to decorate, along with gluing on silk flowers and leaves to the cap, then sprayed everything with clear acrylic glue.
Thursday, September 3, 2009
ANOTHER FAIRY HOUSE
 This is another fairy house for my garden under my eaves.
Here is the link to the original, along with a link to the original inspiration that was on Filth Wizardry
http://craftsandcreationswithkathy.blogspot.com/2009/07/fairy-house.html
For this project, instead of using Sharpie markers to decorate, I used fabric paint on the outside and used a black Sharpie marker to outline the windows, then sprayed the project with clear acrylic paint.
In the center I used "Fiona" from Shrek that had been a Happy Meal toy my son got several years ago.
Thursday, July 30, 2009
FAIRY HOUSE
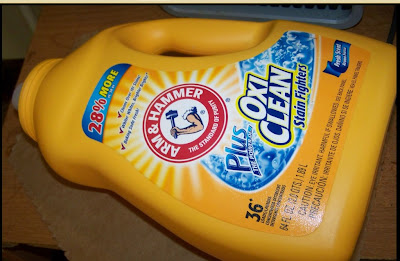
 A great way to upcycle an old laundry bottle into something creative.
This project is based on the fairy houses made over at Filth Wizardry.
http://filthwizardry.blogspot.com/2009/07/fairy-houses-and-fairy-wings-for-your.html
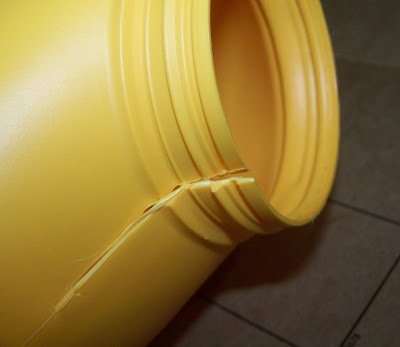
While a child could decorate it after it is cut out, I would not recommend allowing children to do any of the cutting and if it was to be used in play, sanding down the edges or covering with duct tape.
I am using mine as an outdoor decoration under my eaves outside of the garage as it is protected by the elements by the eaves and nearby bushes (and nothing I have ever planted there has grown).
Items used:
- Liquid Laundry detergent bottle
- X-Acto knife and/or craft scissors
- Markers
- Clear Acrylic spray (optional)
 Throughly wash and rinse the laundry bottle, remove any labels that you can, then cut a hole in the front. I tried to follow the curves of the bottom.
On the back and side, draw any type of window that you would like.
Use the X-acto knife to cut out the windows.

I made arched windows and a paned one in the back, but you could make them any way you would like.


It is hard to see on the bottle itself, but you can see on the lid that I colored in flowers with a hot pink marker just above the leaves that I had drawn in. I then sprayed the bottle with clear acrylic spray to seal it, but this would be optional. If you use it, go easy on the spray because if you get too much the marker will start to run and bleed.
Your fairy house is now ready for occupancy. I put a small rabbit that I got a thrift store.
Friday, July 3, 2009
PET FOOD SCOOP FROM LAUNDRY BOTTLE

 When my ex was in hospital and we had to go over twice a day to feed my son's dog, I found what they had been using a coffee cup to scoop out the food, which was tedious and time consuming as the dog is a 100 lb. German Shepherd and it would take several cup fulls to fill the bowl.
I then ran across this project at Kaboose and knew I wanted to try it.
http://crafts.kaboose.com/laundry-bottle-pet-food-scoop.html
Items needed:
- Plastic laundry bottle with handle
- Craft or Heavy Duty Kitchen Scissors
- Items to decorate the scoop - I used a picture, wrapping paper, craft glue, 2 paint chip cards, fabric paint and packing tape
Start with a plastic bottle with a handle.
Remove the plastic insert.
 With the scissors, make a cut down the neck at the seam about two inches long.
Cut around the bottle to make the opening. I went with the curves that were already on the bottle and it made it easier to cut.
 Use the scissors to trim off any rough edges and decorate however you would like. For the front, I used a photo that didn't turn out well and 2 cut up paint chip cards (red and orange) to cover the writing on the bottle and glued it to the bottle with craft glue, then taped it over with packing tape to protect it.
For the back, I used a piece of wrapping paper and cut it in the general shape of the bottle, trimmed it to fit then glued it down with craft glue. I then used fabric paints to write "Maxx's Food Scoop" and went around the edges with the paint to help seal off the edges.


