Bookmark and Share
Showing posts with label Dollar Store. Show all posts

Saturday, June 4, 2011

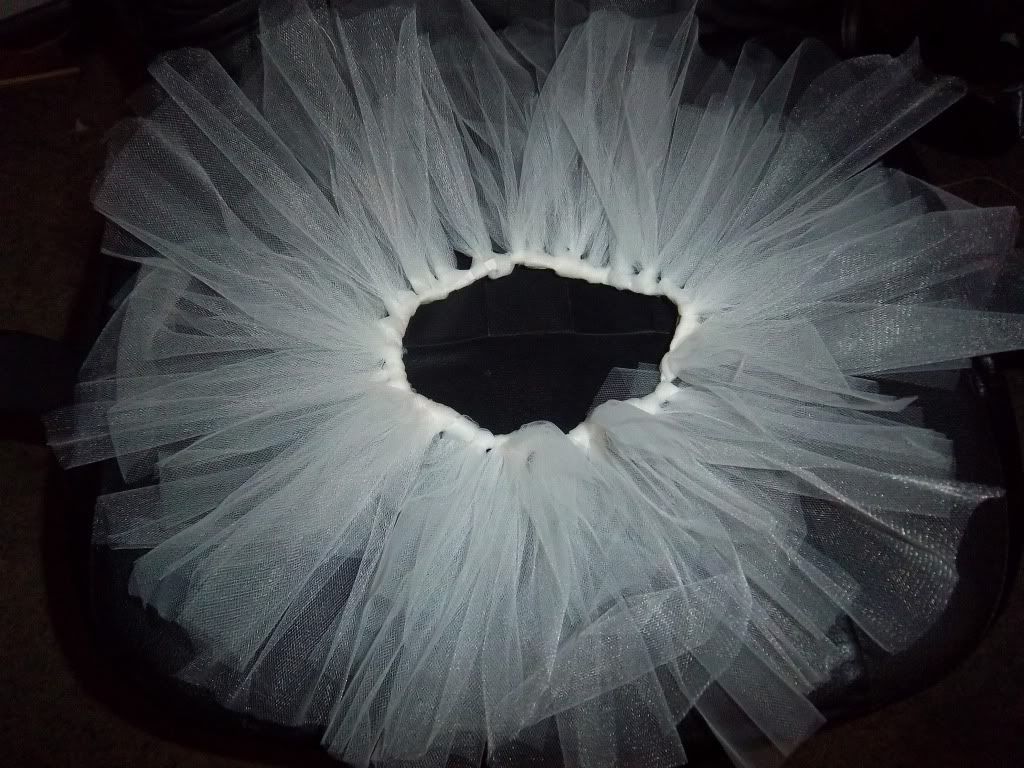
No Sew $2 Dollar Store Tutu

Photobucket
This is tutu I made for my great niece Mia for her 3rd birthday out of two rolls of tulle from the Dollar Tree and 21 inches of elastic.

Items used:

  • 2 rolls of Tulle (from the Dollar Tree)
  • Elastic (waist measurement plus 1 inch

It is based on a prior tutu that I made (tutuorial here) except that it is much fuller and poofier. To get the fullness different lengths tulle ranging from 12 inches to 28 inches with increasing 4 inch intervals (12,16,20,24,28) were used and  I  about 10 of each.   I already had the elastic on hand.

Instead of sewing the ends together, I added 1 inch to the waist measurement and tied the ends together (she is skinny and they may have untie it to make it smaller).

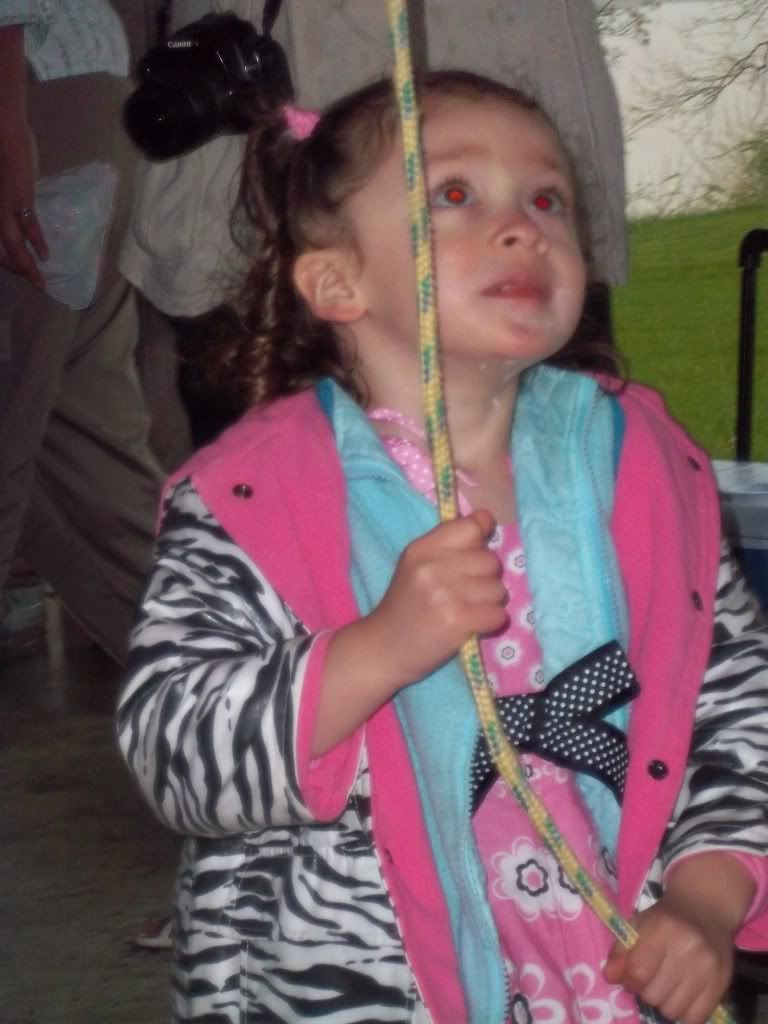
I had hoped to get a picture of her trying it on, but she is independent and inquisitive and hard to keep up with.
Photobucket

Friday, July 30, 2010

TWISTED STONED FLOWERS FROM SCRAPS

Make pretty flowers with from scraps and dollar store decorative stones.

This is super simple, quick and easy.  You can use them to create a statement necklace, barrette, pin...anything you like (I haven't decided yet what I want to do with them).

Items used:
  • Soda Can
  • Paper
  • Paper
  • Pen or Sharpie
  • Scissors
  • Scrap of felt or other sturdy fabric
  • Ruler or seam gauge (optional)
  • Scraps of fabric
  • Decorative stone - small 
  • Hot Glue Gun


Use a soda can or other circular object to draw a circle on a piece or paper.  Cut out and use a template. Place circle on felt, draw around it with a pen or Sharpie then cut out.


I measured off 1 inch of a piece of scrap fabric that was 22 inches long, cut then tore as I wanted a jagged edge - what you use is up to you.  Total I used 2 pieces of 22 inches of fabric for this item.


Use glue gun to glue down fabric and start twisting.  Dab a bit of glue on top of the fabric and glue down the stone.  Twists fabric, dab glue, push down and repeat all the was around the flower, twisting as you go.


Keep on dotting glue at intervals and tacking down - if you run out of the scrap, add another piece of the same or contrasting fabric that you would like or trim the edges and use as is.  I added another length of fabric and trimmed on this one.  On the yellow flower, I dotted glue on the fabric and glued down even after I had gone beyond the circle.

Sunday, July 11, 2010

Dollar Store Fairy Skirt to Under The Sea Themed Fairy Skirt

A Dollar Store Fairy skirt upgraded to an "Under The Sea" themed Fairy Skirt.

This is another tutu for the 2010 Tutu Drive by Samster's Mommy
For this I used some Nemo fabric that was on sale at the fabric store, but any fish, sea themed or even a solid blue color would do for the base and then the Dollar Store fairy skirt was sewn below the waistband and the bottom layer also cut into strips to be sort of a whimsical seaweed.

Items used:
  • Dollar Store Fairy Skirt
  • 1/3 yd fabric
  • Straight Pins
  • Scissors
  • Thread
  • Sewing Machine
  • 3/8 inch elastic - 20 inches
  • Iron
  • Ruler
  • Safety pin


For the hem press up 1/2 inch, then fold over and press again.


Using a sewing machine, stitch 1/4 inch from the edge all of the way around. 


For the top I zigzagged the edges so they would not ravel. 


Press under 1 inch.


Pin the back seam together and sew a 5/8 inch seam up to 1 inch from the top.   Press the seam open and stitch over the pressed edge at the hem 3/4 of and each from the middle seam on each side over the hem so the seam will lie flat.


For the waistband, stitch 5/8 inch from the top the circumference of the skirt, then pin a safety pin to the end of the elastic, thread the elastic through the waistband, then overlap a 1/2 inch at the ends then stitch over the ends several time so the elastic will be secure.


Put the Dollar Store fairy skirt over the top of underskirt and match up the elastic of the fairy skirt to just under the edge of the edge of the waistband of the underskirt, pin into place and stitch down.  I then cut the 2nd layer of the fairy skirt into approximately 2 inch strips.


Samster Mommy Tutu Drive

Wednesday, March 17, 2010

Red Rose Umbrella


This project was inspired by an umbrella that I saw over at Chic Steals.  Although the flowers on the edges class it up a bit, I like how it looked sort of like a vase of roses when it was closed even more.

Items used:
  • Umbrella 
  • 1/2 yard fabric
  • Needle and thread
  • Straight pins
  • Clear glue adhesive
  • Clothespins
This cost me around $3 to make.  I bought the umbrella at the Dollar Tree for $1 and the fabric as a remnant for $1.18.  I used Amazing Goop for the clear glue, but any clear glue fabric adhesive would do.  I had originally planned to hand stitch all of the flowers in place but worried it would make the underside look ugly so I decided to use the clear glue instead.

Cut the fabric into approximately 1" x 22 1/2" strips (I ended up with 28 strips and used 24 on the project).  Thread a needle and put a knot in the end  and baste stitch at the bottom at around 1 inch intervals and then gather up loosely.


Start rolling from the edge that has the knot to create a rose.   The one below is tightly wrapped, but for the majority of the project rolled it much more loosely.  Stitch together to hold it in place at the bottom of the flower.


Repeat on the remaining strips of fabric.


Pin a flower by each of the spokes.

Pin a flower in the center between each of the two flowers at the spokes.   Remove flowers one by one, apply clear glue to the bottom, firmly place back on the umbrella where it was removed from and use a clothespin to hold it in place while it dries, repeat until all flowers are glued on.


As the "roses" on the umbrella are made of rolled up "ruffles" I am entering this in Disney's

Saturday, December 26, 2009

Stoned Picture Frames


These are based on a tutorial over a Ruffles And Stuff for "Easy Fancy Pants Frames" which would never have flown if I had asked my son to make something "girly" as present for his Grandma so instead we are calling these "Stoned Picture Frames".   They were inexpensive and super easy.

http://www.rufflesandstuff.com/2009/12/easy-fancy-pants-frames.html
  •  Picture frames
  • Clear decorative stones
  • Amazing Goop or other strong, clear glue
I bought 2 bags of clear small stones, one round and the other more oval, along with two picture frames, 1 rectangle and one fish shaped from the Dollar Tree.

Position the stones on the frame to see how you want them to look.  My son decided to use the small stones on the fish and larger ones on the rectangular one.  You could add bows or flowers to dress them up more, but my son wanted to keep it simple.

Use the Amazing Goop or other clear glue and apply to the bottom of one of the stones and position it back on the frame and continue until all stones are glued to the frame.

Monday, November 16, 2009

Bejeweled Mini Hair Clips

Turn dollar store mini hair clips from littly girly to glitzy glam with some paint, jewels and glue.
There are several hairstyles that I want to try where I need several small pins or clips, but the only ones that I found were the kind for little girls and in multi-colors which would clash with most of my outfits, so I decide to glam them up to make them more adult and classy looking.

Items used:

  • 1 pkg. mini hair clips


  • Metallic acrylic paint (silver and/or gold)
  • Small plastic Jewels (Dollar Tree, 130 for $1)


  • Foam Paint brush


  • Strong glue (I used Amazing Goop)


I poured paint into a plastic juice can lid and then dipped the brush in until well saturated, then opened up the clip clamp and dabbed the paint on the inside of each clip, then allowed it to dry.

After the inside was dry, I painted the tops, just dabbing them to cover, but not so much as to gum up the the spring, then allowed that to dry.

Then paint the outside of the clips and allow to dry. 


I did this three times for each clip to cover them uniformly.
I picked out the jewels that I wanted to use for each clip, then I put a dab of glue on one side then affixed the jewel to it and allowed it to dry and you are ready to rock and roll with them.

Thursday, June 4, 2009

Craft Supplies Keeper Portable Storage

I made this last year but I am linking it up today for the DIY Show Off's SHow & Tell Surprise Party as this carry-all I use all the time to store (then actually be able to find) small craft items like markers, googly eyes, pipe cleaners, felt pieces, ribbons, snaps, velcro, etc.


The DIY Show Off


This is a craft storage keeper made of two placemats and a box of gallon freezer bags from dollar store and some clearance craft ribbon I got at JoAnns after Christmas for .25 cents. This is what it looks like with supplies in it and tied up.
 
This is what it looks like open with craft supplies - it hold a lot more than it looks like it does and as you have 8 bags, you can keep it separate and organized.


Items used:
  • 2 Placemats
  • 1 Box of Gallon Sized Freezer Ziplock Bags
  • Ribbon, 38 inches
  • Sewing machine
  • Thread
  • Straight pins
 The placemats and the freezer bags are from dollar store and the ribbon I got at JoAnns after Christmas for .25 cents. I had been carrying around my craft stuff a ziplock bag in my tote and decided it was time to tidy it up to make it easier to find different items. I have seen smaller versions of this before with smaller bags and the placemat folded in half, but as I have a lot of craft items that I tote around as I try to craft during my lunch hour at work, I needed something bigger and made one using two placemats and gallon sized ziplock freezer bags.


I laid the freezer bags putting one on top of each other with the bottom facing down about 1/3 of an inch apart, pinned them together then stitched them on the sewing machine (if it gets too slippery you can put a piece of paper under the bags and tear it away when you are done)
Once the bags are stitched together, pin the bags between the two placemans and sew all three layers together.

Cut an 18 in. piece of ribbon and one of the cut edges along the outside edge of the placemat with the long side hanging off the side of the placemat then stitch it down. Do the same on the other side of the placemat.
Tie the ribbon together and you have a craft supplies keeper to tote your crafts around in style.

Wednesday, May 6, 2009

UFO FROM DOLLAR STORE AND UPCYCLED ITEMS

Items needed:
  • Large Plastic Easter Egg (you will only need the top of it for this project)
  • 2 CDs
  • Mini touch light (I bought mine at the Dollar Tree)
  • 3 AAA batteries
  • Glue Gun and glue sticks
  • Cardboard (I used the side off a 24 pack of Diet Coke)
  • 9001 Glue or other craft glue (to glue the CD's together)
  • Aluminum foil
  • Tin can or other object that is about 1/2 in around larger than the circumference of your plastic egg
  • Crochet thread (or other strong thread to string through the top of the UFO)

Glue 2 CDs together using 9001 or other craft glue (I tried using a glue gun on my first attempt and would not recommend it as it did not glue evenly and it was bumpy)
Open up the mini touch light an put the batteries in seen below and then replace cover. Use a can or other item that is slightly larger than the circumferance as the egg to make a circle on cardboard then cut it out. Then place the plastic egg in the center, draw a circle around that then cut it out.
Place the circle of cardboard on the top of the egg and make the edge flush with the bottom of the top of the egg.
Use a thumbtack to make a hole in the top of the plastic egg. Thread a the crochet or other strong thread through the top through the opening and tie a knot and secure on the inside with a bit of glue.
Then use a glue gun to secure the cardboard circle to the egg around the circumference.
Cover the top of the egg and cardboard with aluminum foil then poke a hole the top and thread it through the aluminum foil.
Glue the bottom of the cardboard to the CDs with a hot glue gun. The mini touch light has a strip you can pull off to attach it to things - pull it of and secure it and you may want to use the hot glue gun or the 9001 or other craft glue to secure it to the CD's.
If you need to change the batteries, you can unscrew the bottom of the touch light from the base
that is glued to the CDs.