Bookmark and Share
Showing posts with label photo. Show all posts

Sunday, February 24, 2013

You Are Your Words Collage


I created the above using two free online photo programs - no sign up required!

This could be used to make a great, inexpensive personalized gift for someone.  I used my son's graduation picture and typed things that described him, his likes and dislikes, but  could use a poem, song or bible verses or a list of quotes or whatever you would like.

Items used
The first program is You Are Your Words you need to pick a photo that is portrait length as opposed to landscape.  You also need to have a minimum of 400 that you can type or cut and paste from elsewhere.  

After uploading, you have the choice of 6 colors and 6 different fonts and can also make the words lighter or darker and when you are done you click the download button to save it to your computer.  I chose white, blue and darker blue backgrounds and a different font on each.

Now to the second program, which is PicMonkey (although there are many other programs that will create a collage and they would work as well, I just used this one).   

I picked "Create A Collage" on the first page, uploaded the three photos and selected the "Ducks in A Row" for three pictures and then saved it, then printed it out as I plan on framing it and putting it on the wall.
Thanks for stopping by and If anyone makes a version I would love to see it, just leave a link in the comments section.  

Linking up to:
SixSistersStuff.com

Sunday, November 25, 2012

Stoned Picture Frame


These are based on a tutorial over at  Ruffles and Stuff for "Easy Fancy Pants Frames" and we made them previously  here.   They are inexpensive and very easy to make and add panache to a plain frame.

The only thing that is a bit different is I didn't find a frame in pink at the dollar store and used some hot pink spray paint I had on hand.   

  •  Picture frame (with an edge wide enough to hold the stone you are going to glue on
  • Small clear decorative stones
  • Amazing Goop or other strong, clear glue
  • Spray Paint
  • Newspapers

- Put down newspapers

-Spray the frame with paint, allow to dry

-Check for missed spots, spray again, allow to dry

- Position stones on frame then glue down.

-Leave frame flat until glue is dry.

- Place picture in frame and it is ready for gift-giving.


The photo was Walgreens using their free software to create a collage and you can select up to 20 photos for the collage, but I only used 10 for the above.  I ordered it during a promotion and it was free, but the code has now expired.  From time to time they do offer this special and it usually posted on their photo home page.

http://30minutecrafts.com/2013/05/craft-lightning-week-2.html#utm_source=feed&utm_medium=feed&utm_campaign=feed

Sunday, July 8, 2012

York Photo - $1 Personalized Tote Bags (+S&H)

York Photo currently has a promotion for personalized tote bags for $1(normally $8.99) if you use coupon code  YORKTOTEAD until 7/30/12 and you can get up to a total of 3 bags at that price.

I purchased a total of 3 and shipping was $7.97 and for the above used templates from the "Browse Our Designs" and uploaded my pictures to add.   My total for 3 bags + Shipping and handling was $10.97; a savings for $23.97.

The first one is unfortunately one of the best picture I could get of my son on  graduation day as he has places to go and people to see and didn't have time (and it is a bit Frankensteinish with the van in the background looking like bolts coming out of his neck) using the Apple background.   I used to be a teenager once and understand how it is - you are so afraid you are going to miss out on something cool with your friends so I just had to snap as what I could as soon as possible.

The second one I used the "Love My Soldier" background and added the picture of my son's Edsel and put the "1959 Edsel" at the top.  I using this one to hold presents my son on his birthday and he can later use it to hold cleaning supplies and rags to keep in his car instead of scattering them all over the living room:)

I ordered one more for a friend with a flamingo design for her birthday, but not going to post it so it won't spoil the surprise   I don't have to worry about my son reading this as he has a much interest in reading my blog as I would reading all the strange text acronyms young people type back and forth to each other like IKD, *$,.!!!!,BTW, URHOT, XME, ZZZ or RUMCYMHMD.   

They also have other offers on their "Specials" page 50% off photo books using the code NEWBOOKS until 7/9/12 and the following good until 7/31/12 and shipping and handling will depend on what you buy,
  • 5x7 Easel Panel for $7.80 using the code 40PANEL
  • Adult T-Shirt for $7.80 using code 40SHIRT
  • A Deck of Cards for $10 using code 50CARD
  • Water Bottle for $10 using code 40BOTTLE
Also, if you are signing up with York Photo for the first time, you also get 40 free prints.
I learned of this coupon at Jessica's Coupons.
Jessica's Coupons

Disclaimer:  I have no affiliation with York Photo or Jessica's Coupons and have received nothing for this post - just sharing a deal.

Saturday, June 16, 2012

Graduation Collage

Today is Day 16 for 30 Days of Creativity and the theme is bees, but as it is my son's graduation weekend so I chose to make a photo collage using  free collage software available at Photovisi

Unfortunately, between bad lighting, poor seating, a failing camera and a kid that didn't want his photo taken, these represent the best pictures I was able get of Kyle's graduation on Friday evening. 

Kyle had to be there an hour prior to graduation and his Dad, my ex-husband,  and I went a little before and we had to sit in the handicapped section on the floor behind the graduates due to his Dad being on oxygen and not able to climb stairs.  From our vantage point we ended up watching most of the ceremony from the monitors they had in the center of the auditorium.

For having such as large graduating class, it went rather quickly and smoothly and it was over in an around an hour and a half.  The principal did request everyone show respect for the graduates, as today was all about them, he asked viewers not to hoot and holler and make a spectacle of themselves and draw attention away from the graduates, but of course there were rude people that did.


The picture on the left is of him walking down our pathway for the last time as a non-graduate with a borrowed cap, gown and black shoes (thanks to his friend Cyler).  The bottom center is of him walking into the auditorium, the top center is and overhead shot on the monitor of his graduating class and the right hand side is of him getting his diploma.

Tuesday, June 5, 2012

Clouds

This is for 30 Day of Creativity and the theme for Day 5 is Clouds, so I chose to take pictures of clouds with the sun peeking through on an overcast day.

Saturday, January 23, 2010

Warhol Inspired 60's Gift then Tote Bag


This was made a gift bag for a birthday for someone who had seen one I had made similar to this and then it can function as a tote bag afterward.  This is similar to a bag I had made previously here:

http://craftsandcreationswithkathy.blogspot.com/2009/07/warhol-60s-inspired-tote-bag.html.   

Items used:
  • Tote Bag
  • 1/2 yd. Clear Plastic Sheeting
  • Amazing Goop or Craft Glue
  • Hot Glue Gun
  • Scissors
  • Pen 
  • 11-12 collage photos*

The tote bag is one that I got at Meijers awhile back and the plastic sheeting was a remnant from Walmart's fabric department for 50 cents, but I have also found plastic sheeting before at sometime in hardware stores.


*The photo collages for this project are similar to the tutorial here using the free software at www.picnik.com:   http://www.cutoutandkeep.net/projects/pop_art_portrait_2/versions/6/edit.   


One thing I found out the hard way was when I had prints made up for with four pictures collage that the top was cut off from the top and  of the picture on the top row and the bottom of the picture on the bottom row.  To fix this I used free software from http://www.irfanview.com/ to get a black background then used a screen capture program (http://download.cnet.com/ScreenShot/3000-2192_4-10423334.html - it is a free download) and made the screenshot approximately 550 pixels tall and 785 wide.

This is what it looked like after doing this and I didn't have any problems with the top or bottom being cut off when I had the photos printed off at Walgreens.

Use Amazing Goop or craft glue to glue the pictures on the tote bag.  I used 6 on the back and 5 on the front because the tote bag I got from Meijers had a pocket on the front and I only put pictures on up to the pocket.  Allow time for the glue to dry. 


Next put the bag on the plastic sheeting and trace the bag  around it twice.  It is better that it is a bit bigger than the bag and you can trim off any excess.  Cut along the lines.

Position the plastic o the bag and use hot glue on the edged on the bag then press the plastic into place doing a little bit at a time.

Do the same thing on the front of the bag.    
Once the plastic is glued down on both sides, trim any plastic that is hanging over the edges with a pair of scissors.


I am linking this up to Creative Jewish Mom's first Craft School Sunday Blog.  http://www.typepad.com/services/trackback/6a011570601a80970b0120a803d82a970b.   Every Sunday she will be hosting where crafters and foodies from around the world can share their links via a McLinky.

Also linking up to

Making

Tuesday, December 22, 2009

MERRY CHRISTMAS!


This is our Christmas card for this year.  This was created using the free online software at www.picnik.com.  Click on the Holiday option and there are several free options (all of the above are the free options) although some of the cute options are premium.

Alas, gone are the days when I could dress him in a little Santa or Elf suit.  Now that he is 16, he would only agree to wear his "What Happens Under the Mistletoe Stays Under the Mistletoe" because he couldn't find his "Dear Santa, Let Me Explain..." t-shirt.  

This was taken at our local Home Depot because it was more "manly".  Herefused to have his pic taken with Santa, but if there had been a cute girl elf handy he would have been game.

Friday, July 17, 2009

Warhol 60's Inspired Tote Bag

Turn a photo in to a retro work of art to carry your groceries in! Items used:
  • 1 tote bag
  • 6 photos
  • Craft Glue
  • Packing Tape
  • Scissors

I used a Walgreens bag that I got on sale for .33 cents (they are normally .99 cents not on sale) and it was larg enough to hold 2 pictures across and 3 pictures down.

The photos are of my son checking out a guitar at a local guitar store and is one of his favorite memories, and they were created using free software at Picnik.com and the basic tutorial on how to tint and make collages is posted here: http://www.cutoutandkeep.net/projects/pop_art_portrait_2/versions/6/edit

I had originally intended on putting pictures over the entire bag and use the four picture collage; however, when I went to pick up the pictures from Walgreens where I had them developed, the head were chopped off on all of the 4 picture collages and none were useable, so I went with what I had left. I chose 6 photos, 1 black and white, 1 tinted, 1 with 50% tint and three with tinted 3 picture collages.

Lay them out how you want them to be on the bag.

I used packing tape across the front of the pictures to protect them, then put glue on the back of the photos 2 at a time and made sure it was long enough on each side to slighly overlap the edge.

Trim off the extra tape from the edge and allow to dry.

Monday, July 13, 2009

WARHOL '60'S INSPIRED BARRETTE

Quick and easy and cost less than 50 cents to make.
I made this to go with a pair of shoes with same theme.
Items used:
  • Barrette blank
  • Cardboard
  • Felt
  • Photo
  • Packing tape
  • Craft Glue or Hot Glue Gun
  • Amazing Goop or Hot Glue Gun
  • Ruler
  • Scissors

Measure a square on the cardboard that is 3 1/2 inches wide and 1 3/8 inches tall and cut out.

Glue down the piece of cardboard in the center on the felt cut to proximately 7 inches wide 2 3/4 inches wide, then apply glue to the top of the cardboard and along the center of the felt on each side.

Fold the edges over vertically.

Apply glue along the length of felt and fold the edges over.

Apply the packing tape to the top of the part of the photo you want to use and then glue it on top of the felt piece.

Apply Amazing Goop or hot glue to the barrette, the secure it to the bottom of the felt.

Monday, July 6, 2009

Warholian Photo Collage - Part 2

This is a component for a project for the "Picture This" challenge at Craftster.org.
This was made with free software at Picnik.com and I used the steps that I posted in a prior project:http://www.cutoutandkeep.net/projects/pop_art_portrait_2/versions/6
In this version I made collages with red, blue, yellow and green shaded pictures and then made them into 4 different collages, combined them into a photo collage then used that photo to make a collage (note: Walgreen's photo processing chopped off part of the top and bottom row when I got the picture printed off is why it looks a little off).

Friday, July 3, 2009

PET FOOD SCOOP FROM LAUNDRY BOTTLE

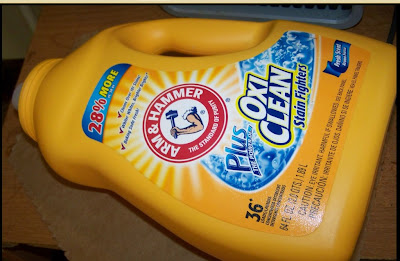
Easy upcycle of an old plastic laundry bottle into a useful pet food scoop. When my ex was in hospital and we had to go over twice a day to feed my son's dog, I found what they had been using a coffee cup to scoop out the food, which was tedious and time consuming as the dog is a 100 lb. German Shepherd and it would take several cup fulls to fill the bowl. I then ran across this project at Kaboose and knew I wanted to try it. http://crafts.kaboose.com/laundry-bottle-pet-food-scoop.html Items needed:
  • Plastic laundry bottle with handle
  • Craft or Heavy Duty Kitchen Scissors
  • Items to decorate the scoop - I used a picture, wrapping paper, craft glue, 2 paint chip cards, fabric paint and packing tape

Start with a plastic bottle with a handle.

Remove the plastic insert.

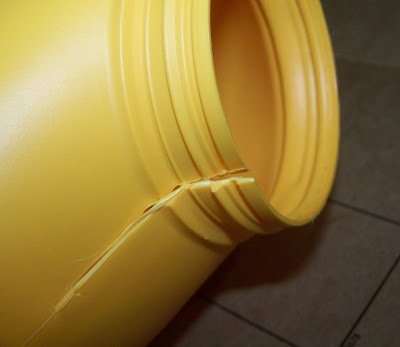
With the scissors, make a cut down the neck at the seam about two inches long.

Cut around the bottle to make the opening. I went with the curves that were already on the bottle and it made it easier to cut.

Use the scissors to trim off any rough edges and decorate however you would like. For the front, I used a photo that didn't turn out well and 2 cut up paint chip cards (red and orange) to cover the writing on the bottle and glued it to the bottle with craft glue, then taped it over with packing tape to protect it.

For the back, I used a piece of wrapping paper and cut it in the general shape of the bottle, trimmed it to fit then glued it down with craft glue. I then used fabric paints to write "Maxx's Food Scoop" and went around the edges with the paint to help seal off the edges.