
- Free pattern and instructions from Dana from "Made"
- Printer and paper
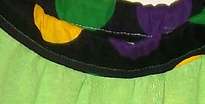
- T-Shirt (Women's large-had been a promotional t-shirt for a local radio station "Froggy 106.7")
- 1/2 yard of coordinating fabric
- Iron on rose (optional)
- Scissors
- Iron
- Sewing machine and thread
- Straight pins
- Saftey Pin (for turning the tie inside out)

I used the base dress pattern and added 1/2 inch to each side to make it a Size 3-4. Instead of positioning the pattern at the bottom and using the t-shirt hem as the hem of the dress, I positioned it as close to the neckline as I could as I wanted to use the design on the t-shirt. I pinned through all layers and cut out the dress and marked the gathering lines with a slight cut at the edge.

Another modification made was instead of sewing the ties directly to the dress I sewed a piece of the contrasting fabric that was 3 inches tall and around 1/2 inch shorter than width of the dress (1/2 seam allowance).
I turned the edges under on each side and turned the edge under 1/4 of an inch under on the open edge and pressed under and pressed the seam up toward the contrasting fabric. I pinned the pressed edge to the edge of the seam from the top side and top stitched along the edge on the front side catching the fabric underneath.

I then threaded each edge through the opening at the left shoulder of the dress and the bow is tied on the right.

First I pressed a hem up 1/2 inch from the bottom edge and stitched 1/4 of an inch from the edge.
Next, I made a gathering stitch the entire length up to 1/2 inch away from each edge and gathered the material. Then, right sides together, stitch the piece together.
Then, pinning with the seam at one edge of the dress, right sides together, evening out the gathers, pin then stitched 1/2 inch from the edge all the way around.

I do have some other craft projects in the works, but have been focusing on the dresses as I plan to mail them out in bulk to Dress A Girl Around The World.
Linking up to:


This is a such a clever idea. My husband has a million old t-shirts that I usually just throw out but this has sparked a wonderful idea. Thanks so much for sharing it.
ReplyDeleteIs so nice dress!Well done!
ReplyDelete