Bookmark and Share
Showing posts with label vest. Show all posts

Saturday, May 7, 2011

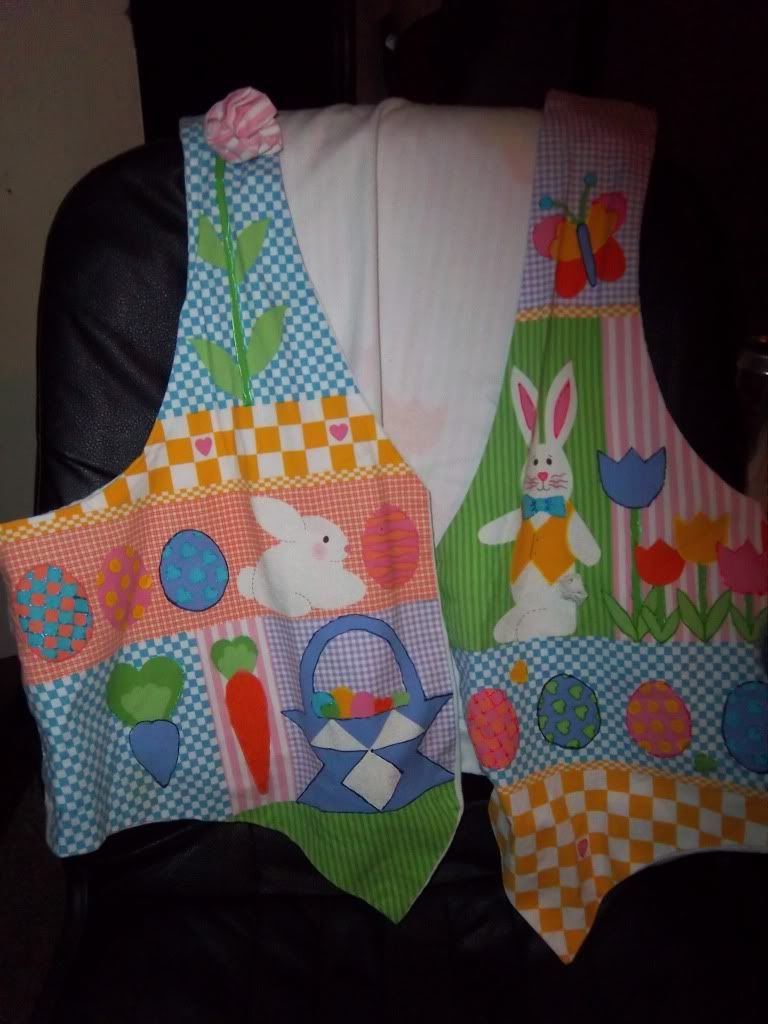
EASTER VEST

Photobucket

Photobucket
I thought I would share this oversized vest I made when my son was little to wear around Easter and I thought I would share as I have gotten lots of compliments on it over the years.

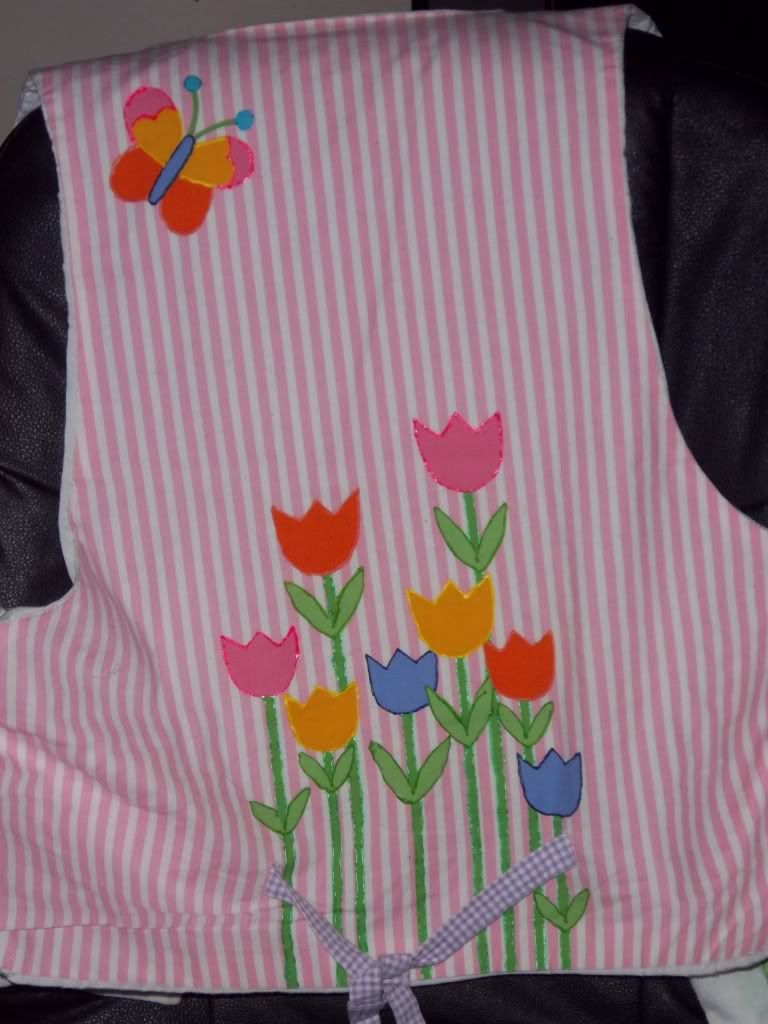
This is a vest made out of pre-printed fabric and fabric, but the pictures are simple and the ideas could easily translated using fabric scraps and fabric paints.  Use an existing vest as a template for the sizing (or make it bigger if you like (be sure to add 1/2 inch all the way around for the seams.  


For the pink flower on the front just use a piece of fabric around 10 inches long and four inches wide, sew a gathering stitch at the bottom, gather and roll into a flower and hand sew where you would like.  

The 2 ties in back are about 10 inches long by 3 inches wide.


I chose to line mine using an old sheet, but you could leave it unlined.  Before sewing the vest together I used the pieces cut out for the front and the back, pinned them to the sheet and then cut out.   I then sewed the vest then and then lining then put the right sides together and stitched all the way around the vest (except for the armhole) leaving an approximate 4 inch opening at the bottom.  I then turned right sides out and hand stitched the edges together at the bottom. 

For the arm holes I pressed the seams under 1/2 inch on each arm hole and hand stitched together, but you could machine stitch 1/4 inch from the edge to save time.

Thursday, August 12, 2010

REVERSIBLE VEST FOR RAG DOLL

A reversible vest based on the actual doll pattern - this could be amended to use with any doll pattern.

This one is for Boy Rag Doll I had made previously and based on this patternhttp://dollydonations.blogspot.com/2010/01/dolly-donations-rag-dolly-tutorial-free.html
and it is made out of scraps - I would guess under 1/4 yd of each fabric.

Items used:
  • 2 different fabrics (1 for each side)
  • Scissors
  • Pins
  • Sewing machine or needle
  • Thread
  • Straight pins
  • Iron
All seams are 1/4 inch.


I used the base pattern for the body of the doll.  For the front I added 1/4 of an inch then angled down about 1 1/2 from the edge of the right hand side down to about 2 1/2 inches for the "V" shape for the front of the vest.  Cut two pieces of each fabric.


Fort he back of the vest, add 1/4 inch to the back fold.   I also added a small diagonal to the back of the vest on the fold side for the neck to fit (as represented by the red line in this photo) but you could add a slight curve instead.  Place the back on the fold of each piece for fabric and cut 1 piece for the back of each piece of fabric.

 This is what the vest pieces before they were sewn.


For one side of the vest, right side together, stitch a the sides together and stitch at the shoulders up to 1/4 inch away from the front edge, backstitching to secure.  Do the same with the other side of the vest.   Press seams open with the iron.


What I didn't do, but recommending for a cleaner finish is press under 1/4 of an inch for each armhole before pinning the right sides of each vest together then stitching all the way around the outer edges except for about 2-3 inches at the bottom.


Turn the vest right side out and then stitch along the bottom edge close to the edge.  Do the same with the armholes.  If you did not press under the edges, you could zigzag around them like I ended up doing, but it isn't as pretty as it would be tucked in and stitched.   I didn't add snaps or velcro to close as I do not know the age of the child that will end up with the doll, but you could add those to close the vest if you like.