Bookmark and Share
Showing posts with label box. Show all posts

Wednesday, December 23, 2009

5 Minute Blinged Box


Bling up a gift box so it can be used for pretty storage later on.

One of the presents that I am giving my niece for Christmas is necklace and I blinged it up with a few plastic jewels so she can store the necklace or other jewelry in if she wants to.

Items used:
  • Small box with lid
  • Amazing Goop Glue
  • Plastic jewels
The box I was already a glitzy red, but you could use a plain box and cover it with pretty wrapping paper.  The plastic jewels were in from The Dollar Tree - it came in a bag of around 100 assorted gems.  Choose the jewels that you want to use and set them on the box to see how they look.  Once you have the look you want, put a small dab of glue on the back of the plastic jewel and carefully place it on the box.   Don't put too much glue on the back or it will come out around the edges and look all globby.  

Thursday, May 21, 2009

POP ART JOURNAL

I wanted to keep a journal to jot down ideas and lists of things and have it sort of pop artish, but the ones that I found in the stores started about about $12 and went up from there, so I decided to make my own.
This worked out even better and everything but the felt and the glue on this is recycled/upcycled cardboard and paper and my cost out of pocket was under 25 cents.
As this was my first attempt at something like this, it is a little rough, but I do plan on making more for these for Christmas presents.
  • Fruit By The Foot box
  • Diet Coke 12 pack box
  • 1 piece red felt
  • Lots of scrap 8 1/2 x 11 paper cut or torn into quarters
  • Craft Glue
  • Hot Glue Gun and glue sticks

I started with th Fruit by the Foot box as it is just a bit bigger than a quarter sheet of 8 1/2 x 11 sheet of paper and the right size for this project, but you could start with a cereal or other small box and adjust the size or make the paper a different size.

Cut the top, bottom, and right hand side off from the Fruit by the Foot box.
You could skip adding the outside box for reinforement and decoration if you wanted to, but I wanted my journal to be sturdy and I wanted the Diet Coke for the outside of the journal, so I cut the top, bottom, and right hand side off from the Fruit by the Foot box.
I then cut the pieces from the Diet Coke box that was at least 1/4 of an inch wider on the each side.
Then fold the egdes over then cutting the corners off and glued it to the Fruit By the Foot Box with craft glue on the outside and hot glue on the inside edges.
NOTE: I pieced mine together from several pieces off the Diet Coke box, but it would be easier and you would get a more professional looking results if you just a single piece from the Diet Coke box (after seeing the picture I did attempt to straightern the edge a bit more, but didn't take a pic - another thing to note is if you have any sort of digital camera, take a picture of your projects and then check them for anything you might need to adjust - your eye tends to forgive the project you put love and time into; the camera doesn't and will give you a strangers eye view of the project).
For inside front and back, I cut 2 pieces from the felt that were approximately 1/8th of an inch shorter on the top, bottoms and sides with the piece closest to the spine flush with the bend for the spine and glued it down to the inside cover with a hot glue gun. I would recommend doing this slowly and in stages, starting at the top edge and working down, otherwise the glue dries too fast and it can wrinkle up the fabric.
Next, square up the pages of scrap paper and make sure that if there is printing on one side, that it is facing the back fo the book, then glue in small sections at a time to the spine of the book.

Friday, April 10, 2009

POP BOXES EASTER BASKET

Here is a quick and easy way to upcycle two empty soda boxes into an pop artish looking Easter basket that can be recycled once you are done with it. My son is in high school and collects Coca Cola memorabilia, so I will not be decorating this any further, but you could decorate it with Easter wrapping paper, magazine pages or even drawing a child has made. It cost me no money out of pocket and only took 10 minutes to make. Items needed:
  • 2 empty cardboard boxes from 12 packs of soda
  • Heavy duty scissors (I used kitchen scissors from the Dollar Store)
  • Craft Glue
  • Hot Glue Gun and glue stick
  • Easter Grass

Cut the top off of the box that you want to use as your basket.

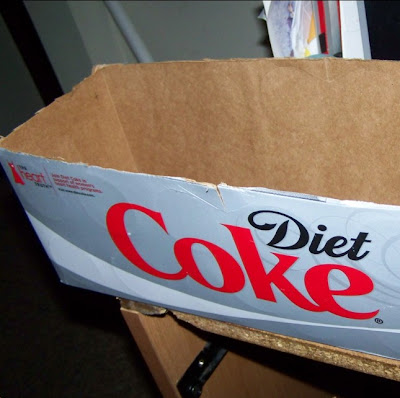
Cut the handle from the other box - I made my handle about 4 inches wide and the length is two short sides and the long side of one. Cut two of these (I ended up having to piece together the handle on the inside when I glued it down as the box I used was pretty tore up).

Use craft glue one the outside layer of the handle and glue the inside layer to the outside layer, then trim so they match up.

Use the hot glue gun to glue the handle to the inside of the box on each side.

Fill with Easter Grass and you are done!