Bookmark and Share

Sunday, June 24, 2012

Triple Cocktail Jello Brain


This yummy and jiggly treat was made using the new cocktail flavors that Jello has out on the market layered in a brain mold.

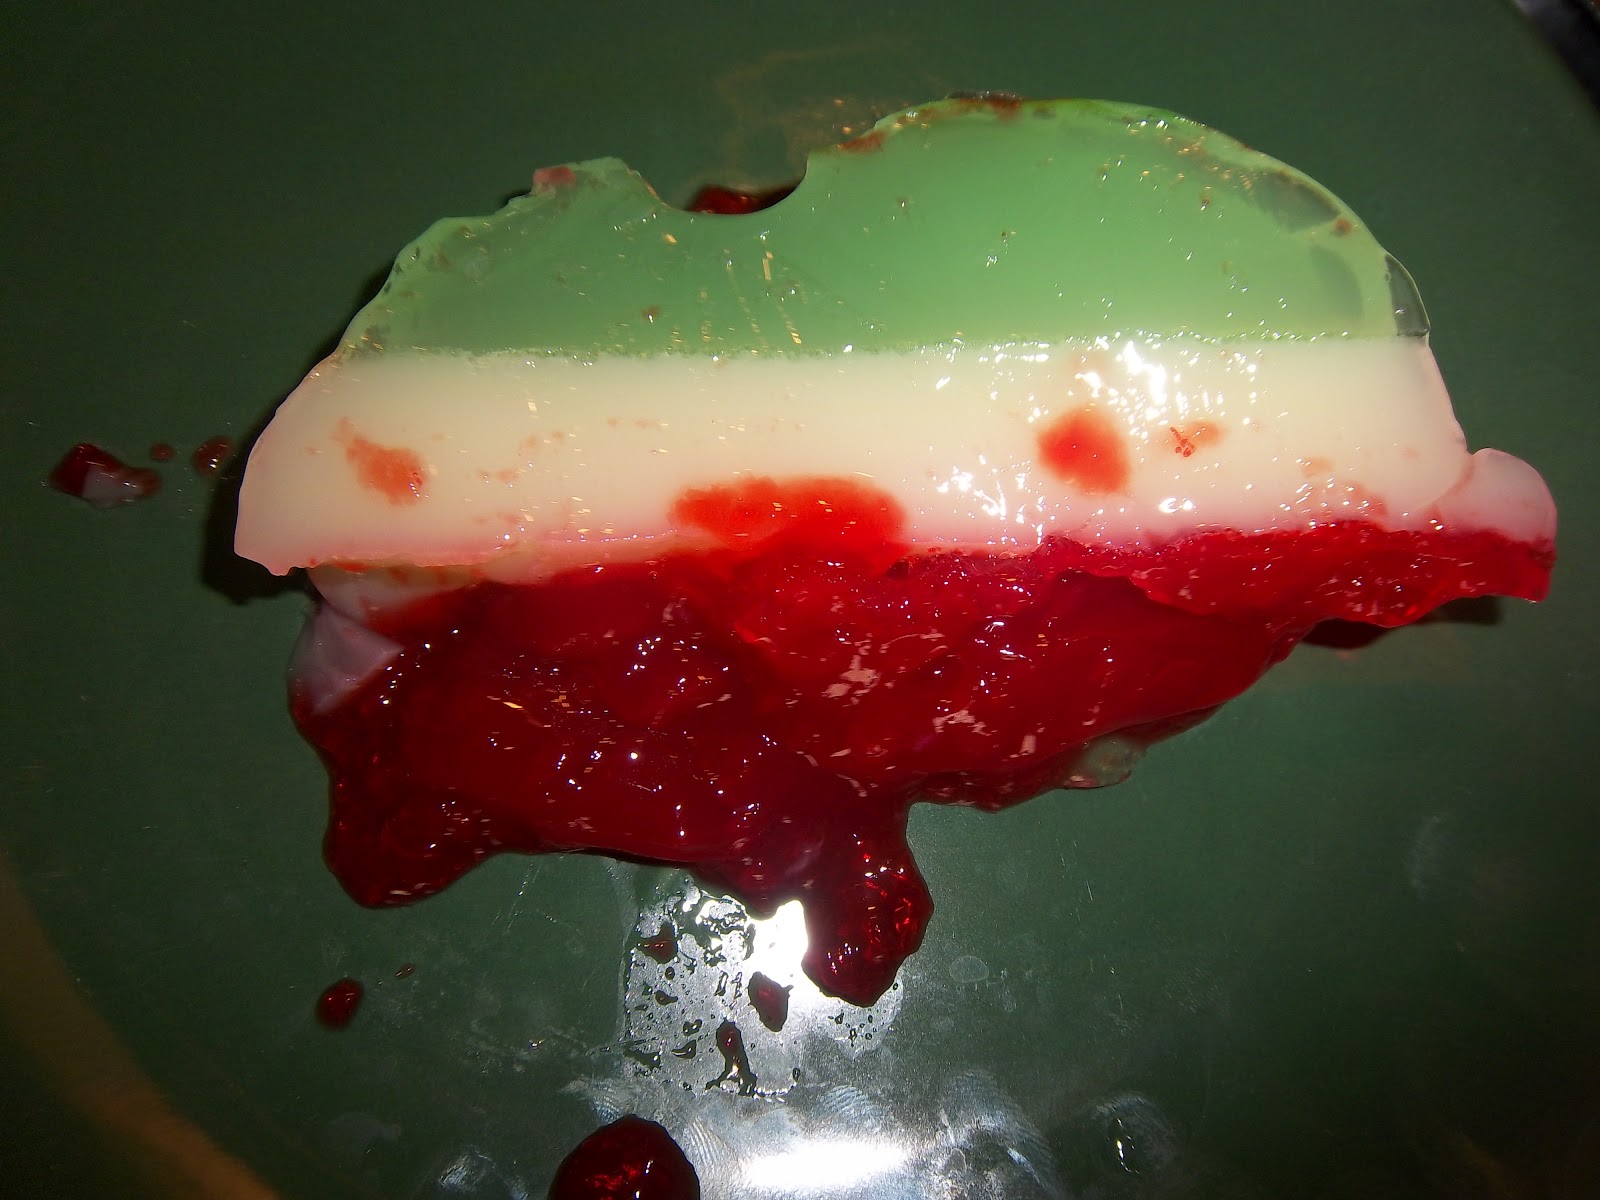
It is also the same colors of the Italian Flag, so you could say it is an Italian Triple Cocktail Brain. (Dissected "Brain" on a plate, pictured left.)
 
This is a non-alcohol version, but you could substitute tequila in the margaritas and rum in the Pina Colada for the cold water used in this recipe instead.


Items used:
  • Brain mold ((Kraft Foods has for sale here)
  • 1 3oz box Margarita  Jello
  • 1 3oz box Pina Colada Jello
  • 1 3oz box Strawberry Margarita Jello 
  • Measuring Cups & Mixing Spoon
  • Water and method to boil it
  • Small Mixing bowl
  • Large bowl 
  • Serving plate
  • Butter Knife
Pour Margarita Jello in small mixing bowl.  Boil 3/4 cup of water and stir into the jello until dissolved.  Add 1/2 cup cold water.

Pour into Brain mold and allow to set (I left it in for 2 hours).


Pour Pina Colada Jello in small mixing bowl.  Boil 3/4 cup of water and stir into the jello until dissolved.  Add 1/2 cup cold water.

Pour into Brain mold on top of the Margarita layer and allow to set (I left it in for 2 hours).


Pour Jello in small mixing bowl.  Boil 3/4 cup of water and stir into the jello until dissolved.  Add 1/2 cup cold water.

Pour into Brain mold on top of Margarita and Pina Colada layer and allow to set (I left it in for 2 hours).


Once set, pour warm water in the large bowl, just enough to come up below the rim of the mold and then run butter knife under warm water and run it around the edges to loosen.

Remove from bowl and place serving plate on top of the mold.


Hold the edges of the mold and the plate and flip the mold over to remove the brain.


Linking up to:


and


Saturday, June 23, 2012

Printable Coupon for Reynold's Parchment Paper & Aluminum Foil

I know it is a little early and a little hot to be thinking about holiday baking, but on Reynolds Kitchens site they currently have available a coupon for $1.00 off parchment paper, which is great for evenly baked cookies that don't stick to the sheet and super-fast clean up.  

Here is a link to the coupon, which is good until 7/23/12 on Reynold's site   


Coupon Link for Parchment Paper Here

Depending on where you live/shop the cost is between $3-$5 for a roll.   The coupon link also has a recipe for Crisp & Crunchy Sugar Cookies below the coupon, or if you are not interested in that you can stop the print after the coupon itself is printed, which is what I usually do on coupons to save ink.


They also have a link for .75 cents off on aluminum foil that is great for use on a grill for quick clean up.


Coupon Link for Aluminum Foil Here

For either coupon, you will need to enter your name and e-mail address to get the coupon.


Disclaimer:  I have no affiliation with Reynolds and have received nothing for this post; I just sharing a deal that is useful to me

Friday, June 22, 2012

Bows 'N Tulle 20 Minute T-Shirt Refashion

 
I wanted to fancy up a t-shirt with a somewhat vintage feel and created this for $2 using only a pair of scissors - no sewing required!  (1st picture is bow tied onel second picture is bow tied twice).

Items used:
  • T-shirt
  • Roll of 6 inch wide tulle (Purchased at Dollar Tree $1 - found in the bridal section)
  • Scissors
  • Seam gauge or ruler
  • 1 piece scrap paper
  • Pencil or marking chalk
  • Safety pin
At the neckline, measure and mark 1/2 inch below the binding and cut.


Using a piece of paper I folded a long triangle with the base being and inch and 1/2 wide and cut it out.  Place up against the bound end of the sleeve with the narrowest part at the top and the widest at the bottom and mark.


At the neckline, measure 3/4 of an inch down and mark all the way around.  Mark the center front and back on the shirt.  One inch from each mark will be where you want to start your 2 inch markings.

 From the 3/4 inch mark, measure two inches down and mark all the way around at two inch intervals.


On the sleeves, starting at the top of the sleeve, also measure 3/4 inch from the edge and mark, then measure two below that mark and mark on the sleeve at two inch intervals.


Make cuts where marked.  I found it easiest to fold the fabric in half on the line marked and begin the cut.  Repeats all the way around the neckline and on the sleeves.


For the neckline, I cut a piece approximately 2 1/2 yards of tulle and folded the bottom up 2 inches and the top down two inches and folded the end over and secured with a safety pin to make it easier to thread through the neckline.


Start threading two cuts below the right hand side on the t-shirt weaving in and out all the way around then tie into a bow.   Trim bow to the length you want.


On the sleeve,  start one cut down from the top and thread all the way around, tie a bow and cut ends to the length you want, repeat on the other sleeve.


This is for Day 22 for 30 Days of Creativity

Wednesday, June 20, 2012

Girls Fireflies Dress from a T-Shirt


I always liked fireflies and decided to use up some of my glow-in-the-dark fabric paint to create a fireflies themed dress (girls size 2-3) using a green t-shirt.
Items used:
  • Free pattern and instructions from Dana from "Made"
  • T-Shirt (I used a women's large)
  • Printer and paper
  • Glow-In-The-Dark fabric paint
  • Scissors
  • Iron
  • Sewing machine and matching thread 
  • Straight pins
  • Saftey Pin (for turning the tie inside out)


The "fireflies" were made making a somewhat bottom heavy cross shape in a diagonal pattern on the front and back of the dress before stitching together.


 I adapted the "Warhol Dress" by Dana from "Made" and added 2 1/2 inches to the top of the pattern and folded under 1/2 inch, pressed then stitched down, then 1 1/4 inch, pressed then stitched down 1/4 inch from the edge at the bottom on each side. 


I then stitched the ties together inside out leaving the ends open and used a safety pin to turn right side out the pressed with an iron.
 I then  threaded the ties through to make it more adjustable as I am going to be sending it to Dress A Girl Around the World.


Linking up to:
Rhinestone Beagle