Pages

Sunday, June 24, 2012

Triple Cocktail Jello Brain


This yummy and jiggly treat was made using the new cocktail flavors that Jello has out on the market layered in a brain mold.

It is also the same colors of the Italian Flag, so you could say it is an Italian Triple Cocktail Brain. (Dissected "Brain" on a plate, pictured left.)
 
This is a non-alcohol version, but you could substitute tequila in the margaritas and rum in the Pina Colada for the cold water used in this recipe instead.


Items used:
  • Brain mold ((Kraft Foods has for sale here)
  • 1 3oz box Margarita  Jello
  • 1 3oz box Pina Colada Jello
  • 1 3oz box Strawberry Margarita Jello 
  • Measuring Cups & Mixing Spoon
  • Water and method to boil it
  • Small Mixing bowl
  • Large bowl 
  • Serving plate
  • Butter Knife
Pour Margarita Jello in small mixing bowl.  Boil 3/4 cup of water and stir into the jello until dissolved.  Add 1/2 cup cold water.

Pour into Brain mold and allow to set (I left it in for 2 hours).


Pour Pina Colada Jello in small mixing bowl.  Boil 3/4 cup of water and stir into the jello until dissolved.  Add 1/2 cup cold water.

Pour into Brain mold on top of the Margarita layer and allow to set (I left it in for 2 hours).


Pour Jello in small mixing bowl.  Boil 3/4 cup of water and stir into the jello until dissolved.  Add 1/2 cup cold water.

Pour into Brain mold on top of Margarita and Pina Colada layer and allow to set (I left it in for 2 hours).


Once set, pour warm water in the large bowl, just enough to come up below the rim of the mold and then run butter knife under warm water and run it around the edges to loosen.

Remove from bowl and place serving plate on top of the mold.


Hold the edges of the mold and the plate and flip the mold over to remove the brain.


Linking up to:


and


Saturday, June 23, 2012

Printable Coupon for Reynold's Parchment Paper & Aluminum Foil

I know it is a little early and a little hot to be thinking about holiday baking, but on Reynolds Kitchens site they currently have available a coupon for $1.00 off parchment paper, which is great for evenly baked cookies that don't stick to the sheet and super-fast clean up.  
Here is a link to the coupon, which is good until 7/23/12 on Reynold's site   


Coupon Link for Parchment Paper Here

Depending on where you live/shop the cost is between $3-$5 for a roll.   The coupon link also has a recipe for Crisp & Crunchy Sugar Cookies below the coupon, or if you are not interested in that you can stop the print after the coupon itself is printed, which is what I usually do on coupons to save ink.


They also have a link for .75 cents off on aluminum foil that is great for use on a grill for quick clean up.


Coupon Link for Aluminum Foil Here

For either coupon, you will need to enter your name and e-mail address to get the coupon.


Disclaimer:  I have no affiliation with Reynolds and have received nothing for this post; I just sharing a deal that is useful to me

Friday, June 22, 2012

Bows 'N Tulle 20 Minute T-Shirt Refashion

 
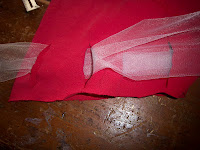
I wanted to fancy up a t-shirt with a somewhat vintage feel and created this for $2 using only a pair of scissors - no sewing required!  (1st picture is bow tied onel second picture is bow tied twice).

Items used:
  • T-shirt
  • Roll of 6 inch wide tulle (Purchased at Dollar Tree $1 - found in the bridal section)
  • Scissors
  • Seam gauge or ruler
  • 1 piece scrap paper
  • Pencil or marking chalk
  • Safety pin
At the neckline, measure and mark 1/2 inch below the binding and cut.


Using a piece of paper I folded a long triangle with the base being and inch and 1/2 wide and cut it out.  Place up against the bound end of the sleeve with the narrowest part at the top and the widest at the bottom and mark.


At the neckline, measure 3/4 of an inch down and mark all the way around.  Mark the center front and back on the shirt.  One inch from each mark will be where you want to start your 2 inch markings.

 From the 3/4 inch mark, measure two inches down and mark all the way around at two inch intervals.


On the sleeves, starting at the top of the sleeve, also measure 3/4 inch from the edge and mark, then measure two below that mark and mark on the sleeve at two inch intervals.


Make cuts where marked.  I found it easiest to fold the fabric in half on the line marked and begin the cut.  Repeats all the way around the neckline and on the sleeves.


For the neckline, I cut a piece approximately 2 1/2 yards of tulle and folded the bottom up 2 inches and the top down two inches and folded the end over and secured with a safety pin to make it easier to thread through the neckline.


Start threading two cuts below the right hand side on the t-shirt weaving in and out all the way around then tie into a bow.   Trim bow to the length you want.


On the sleeve,  start one cut down from the top and thread all the way around, tie a bow and cut ends to the length you want, repeat on the other sleeve.


This is for Day 22 for 30 Days of Creativity

Wednesday, June 20, 2012

Girls Fireflies Dress from a T-Shirt


I always liked fireflies and decided to use up some of my glow-in-the-dark fabric paint to create a fireflies themed dress (girls size 2-3) using a green t-shirt.
Items used:
  • Free pattern and instructions from Dana from "Made"
  • T-Shirt (I used a women's large)
  • Printer and paper
  • Glow-In-The-Dark fabric paint
  • Scissors
  • Iron
  • Sewing machine and matching thread 
  • Straight pins
  • Saftey Pin (for turning the tie inside out)


The "fireflies" were made making a somewhat bottom heavy cross shape in a diagonal pattern on the front and back of the dress before stitching together.


 I adapted the "Warhol Dress" by Dana from "Made" and added 2 1/2 inches to the top of the pattern and folded under 1/2 inch, pressed then stitched down, then 1 1/4 inch, pressed then stitched down 1/4 inch from the edge at the bottom on each side. 


I then stitched the ties together inside out leaving the ends open and used a safety pin to turn right side out the pressed with an iron.
 I then  threaded the ties through to make it more adjustable as I am going to be sending it to Dress A Girl Around the World.


Linking up to:
Rhinestone Beagle

Tuesday, June 19, 2012

Yellow Dress for 6-12 month old

I made this dress entirely out of scraps using a free pattern and instructions from My Measuring Tape
and will fit an infant size 6-12 months.

To add the seam allowance to the pattern I used a popsicle stick for the width on paper, cut a little beyond the line and used a glue stick to glue to the pattern

I varied from the instructions in that I used double fold bias tape to finish the neck and arm holes and instead of using two different fabrics for the panels, I used four and for the bottom I used the hem cut off from a skirt that was too long.   Instead of using a button I sew on a strip of velcro. 

        Free Pattern & Instructions here

Items used:
  • Scraps from 6 other projects/alterations (if buying new under 1/2 yard for the panels and less for bodice and the bottom.
  • Printer and paper
  • Scissors
  • Glue Stick
  • Popsicle Stick (used to measure seam allowance)
  • Sewing machine and matching thread
  • Straight pins
  • Iron
  • Velcro
I also didn't use skirt panel A where it said to cut 8 pieces as I didn't find where it was needed anywhere; perhaps is a variation if you wanted to add below the bodice but before the skirt panels.

This is for Day 18 of 30 Day of Creativity with the theme being "Yellow" and is for donation to Dress A Girl Around The World, a non-profit organization that collects dresses and distributes them to girls around the world.

Saturday, June 16, 2012

Graduation Collage

Today is Day 16 for 30 Days of Creativity and the theme is bees, but as it is my son's graduation weekend so I chose to make a photo collage using  free collage software available at Photovisi

Unfortunately, between bad lighting, poor seating, a failing camera and a kid that didn't want his photo taken, these represent the best pictures I was able get of Kyle's graduation on Friday evening. 

Kyle had to be there an hour prior to graduation and his Dad, my ex-husband,  and I went a little before and we had to sit in the handicapped section on the floor behind the graduates due to his Dad being on oxygen and not able to climb stairs.  From our vantage point we ended up watching most of the ceremony from the monitors they had in the center of the auditorium.

For having such as large graduating class, it went rather quickly and smoothly and it was over in an around an hour and a half.  The principal did request everyone show respect for the graduates, as today was all about them, he asked viewers not to hoot and holler and make a spectacle of themselves and draw attention away from the graduates, but of course there were rude people that did.


The picture on the left is of him walking down our pathway for the last time as a non-graduate with a borrowed cap, gown and black shoes (thanks to his friend Cyler).  The bottom center is of him walking into the auditorium, the top center is and overhead shot on the monitor of his graduating class and the right hand side is of him getting his diploma.

Friday, June 15, 2012

Updated Monster Hoodie

This is for Day 15 of .30 Days of Creativity with a theme of "Monsters".

I updated a Monster Hoodie I had made previously adding a 2nd set of teeth underneath to make it look more ominous.


Thursday, June 14, 2012

Milk Chocolate Chip Browies

This is for Day 14 of  30 Day of Creativity; while the theme is "Quotations" and I had a different idea in mind for that project, I didn't have the time so instead, I am sharing these Milk Chocolate Chip Brownies that I made using a brownie mix made according to the directions on the package and I added 1 cup of Milk Chocolate Chips, which made it moister and more milk chocolately.

Bicycle Dress from T-Shirt

 This size 3-4 girls dress was made using a free pattern and instructions by Dana from "Made" using a large t-shirt.  The only variations that I made is instead of freezer paper stenciling a banana for the "Warhol" dress, I used free clip art from The Graphics Fairy of a Vintage Bicycle and added a ruffle at the bottom using a decorative stitch.

Items used:
  • Free pattern and instructions from Dana from "Made"
  • The Graphics Fairy of a Vintage Bicycle
  • T-Shirt (I used a women's large)
  • 2 pieces of fabric 2 1/2 inches by 26 inch fabric for bow
  • 1 piece of fabric 2 inches by 36 inches for ruffle
  • Printer and paper
  • Black fabric paint
  • Scissors
  • Iron
  • Sewing machine and matching thread 
  • Straight pins 

I followed the instructions up to cutting out and stitching armholes and gather stitching, but before stitching together I printed off a half-page image of the bike then played around with where I wanted to position it on the dress.


 Using the black fabric paint I went over all of the black lines with black paint the positioned it on the t-shirt with the paint side down and lightly patted it down to transfer the image (Note:  it will be a mirror image to whatever image you are transferring, so it won't work with lettering).


For the remainder of the dress, I followed the instructions.

I also added a two inch ruffle (approximately 1 yd wide) at the bottom, using an iron to press up a 1/2 inch hem then stitching down and using a gather stitch at the top.  I then sewed the ends together, pinned underneath the shirt at the hem then applied the decorative stitch to finish.

Linking up to:

Tuesday, June 12, 2012

Cheap and Easy DIY Tassel Earrings

These simple tassel earring only took about 10 minutes to make and cost practically nothing to make.

Items used:
  • Crochet thread (or embroidery thread would be pretty)
  • Scissors
  • Matchbox
  • Pencil
  • Hot Glue gun and glue sticks
  • 2 gold 10mm jump rings
  • 2 gold ear wires
  1. Line thread up with the bottom of matchbox lengthwise and wrap 15 times then cut thread.
  2. Place a small dab of hot glue across the back 1/4 of an inch down to secure the threads.
  3. Push the threads off of the matchbox and on to a pencil at the top.
  4. Use a piece of thread (8 inches or more) and tie around the earrings tassel and knot in the back, tie a knot and then continue wrapping around and knotting in the back.  Clip ends.
  5. Remove pencil, open jump ring and thread through the loop and the ring at the end of the ear wire and close.
  6. Cut threads at the bottom end
This is  for Day 12 with the theme of "String" for 30 Days of Creativity.
Also linking up to:


150x200

Sunday, June 10, 2012

PAC MAN GLOW IN THE DARK MIU MIU INSPIRED COLLAR


Front view (above), back view (left), full view opened with the lights out (right)


This of for Day 10 of 30 Days of Creativity with the theme beiing 8 bit video games.  As Miu Miu had a detachable collar with birds or cats a season back and I love Pac Man, I decided to combine the two ideas to make this Pacman Glow In The Dark inspired collar and there is no sewing involved.  With the exception of the glow in the dark paint, E6000 glue and googly eyes, all items are upcycled from other garments.

Items used:
  • White shirt with collar
  • Paper and pen
  • Cap off a soft drink bottle
  • Scrap of paper
  • Fabric scraps, 1 in yellow and 4 different solid colors (cotton works best)
  • Heat N Bond Iron on fusing
  • Iron
  • Scissors
  • E6000 Glue
  • 9 small googly eyes.
  • Glow In The Dark Fabric Paint
1.    Cut collar off of shirt just below the collar band.

2.  Use the soft drink bottle to draw two circles.  For the Pac Man draw two lines to cut out the mouth.

For the ghosts, draw a straight line down on the sides, a notch next to each side on the inside and a rounded notch in the middle.  So the would be the same on each side I folded the paper in the middle then cut out and unfolded.

3.  Draw the shapes on the HeatNBond (1 Pac Man & 4 Ghosts) then cut out.   Iron on the Pac Man to the yellow fabric and each of the Ghosts to a different color of fabric and cut out.

To iron on at the front collar, angle toward the front and pin to check how it will look; when it looks like the Pac Man is chasing the Ghost, iron on.


4.  Pin on the remaining Ghost, one at center back the other two half way in between the Pac Man and other Ghost then iron on.


5.  Glue two googly eyes on each ghost and one on Pac Man.   To finish the edges, use the glow in the dark paint and outline each of the Ghosts and the Pac Man then allow to dry.

One dry, dot three dots in between each Ghost.


Linking up to:
150x200